
Flourish Forms is a drag-and-drop form builder for Shopify. Create leads, feedback, and survey forms (or describe one and let AI build it) then embed it anywhere on your storefront. It never touches your checkout, orders, or customer data.
Overview
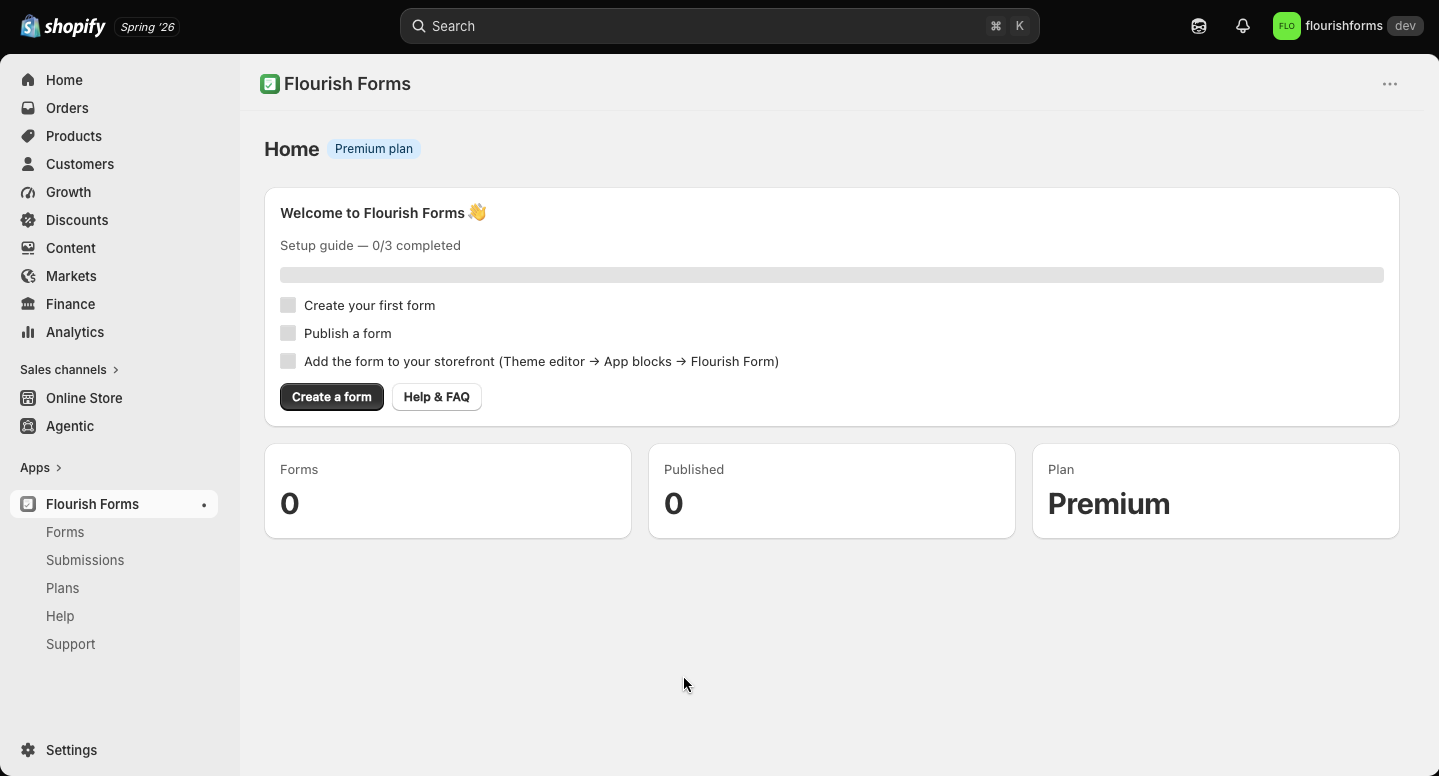
Open Flourish Forms from your Shopify admin. The home screen shows a setup guide (create a form → publish → add it to your storefront) and cards for your form count, published count, and current plan. The left menu has:
- Forms: create and edit your forms.
- Submissions: every response across your forms.
- Plans: see your limits and upgrade.
- Help & Support: this guide and how to reach us.
Create a form
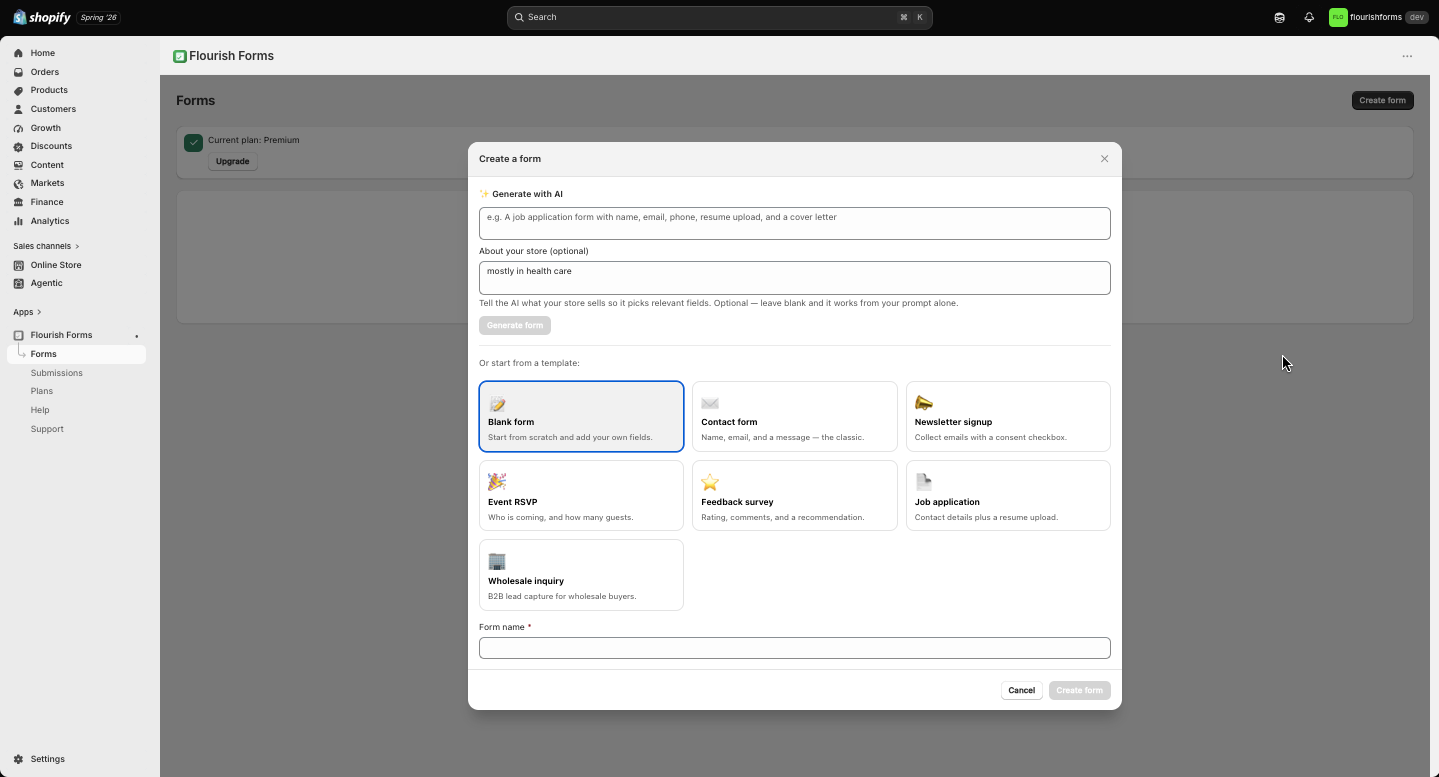
Click Create form and choose how to start:
- Generate with AI: describe what you want and let AI build it (next step).
- A template: Contact, Newsletter signup, Event RSVP, Feedback survey, Multi-step form, Job application, or Wholesale inquiry.
- Blank form: build from an empty canvas.
Give it a name and click Create form to open it in the builder.
Generate with AI
Describe the form in plain language, e.g. “a product feedback survey with a rating and a comment.” For more relevant fields, add a short “About your store” note (what you sell). AI returns a complete form with the right fields, real options, and helpful labels, ready to edit.
The builder & field types
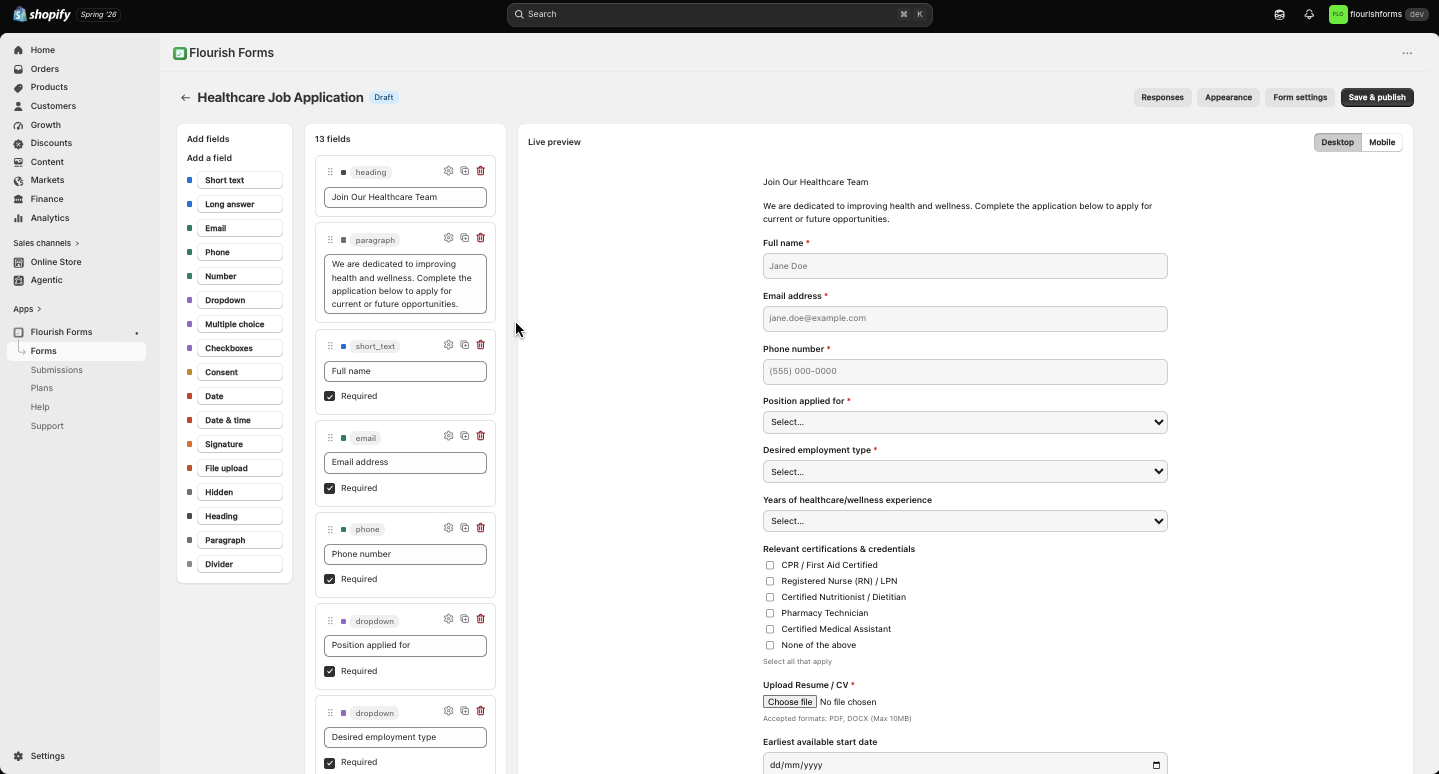
The builder has three areas: Add a field (the palette on the left), the fields list (drag to reorder, click the gear to edit, duplicate, or delete), and a Live preview (toggle Desktop / Mobile) that updates as you go. The top bar has Responses, Appearance, Form settings, and Save & publish.
Available fields:
- Short text, Long answer, Email, Phone, Number
- Dropdown, Multiple choice, Checkboxes, Date, Date & time
- File upload, Signature, Consent, Hidden
- Heading, Paragraph, Divider (layout)
Mark any field Required, and add a placeholder or help text.
Multi-step forms
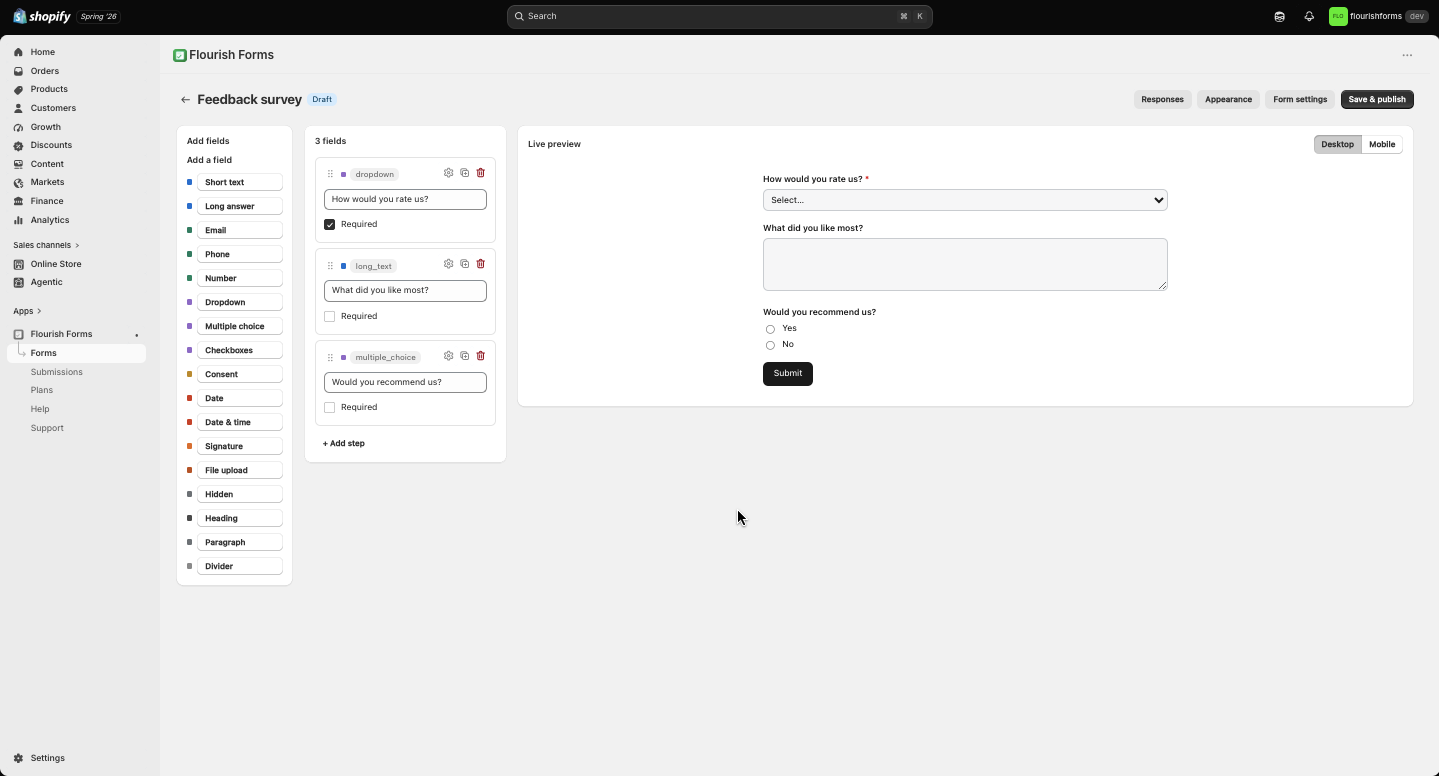
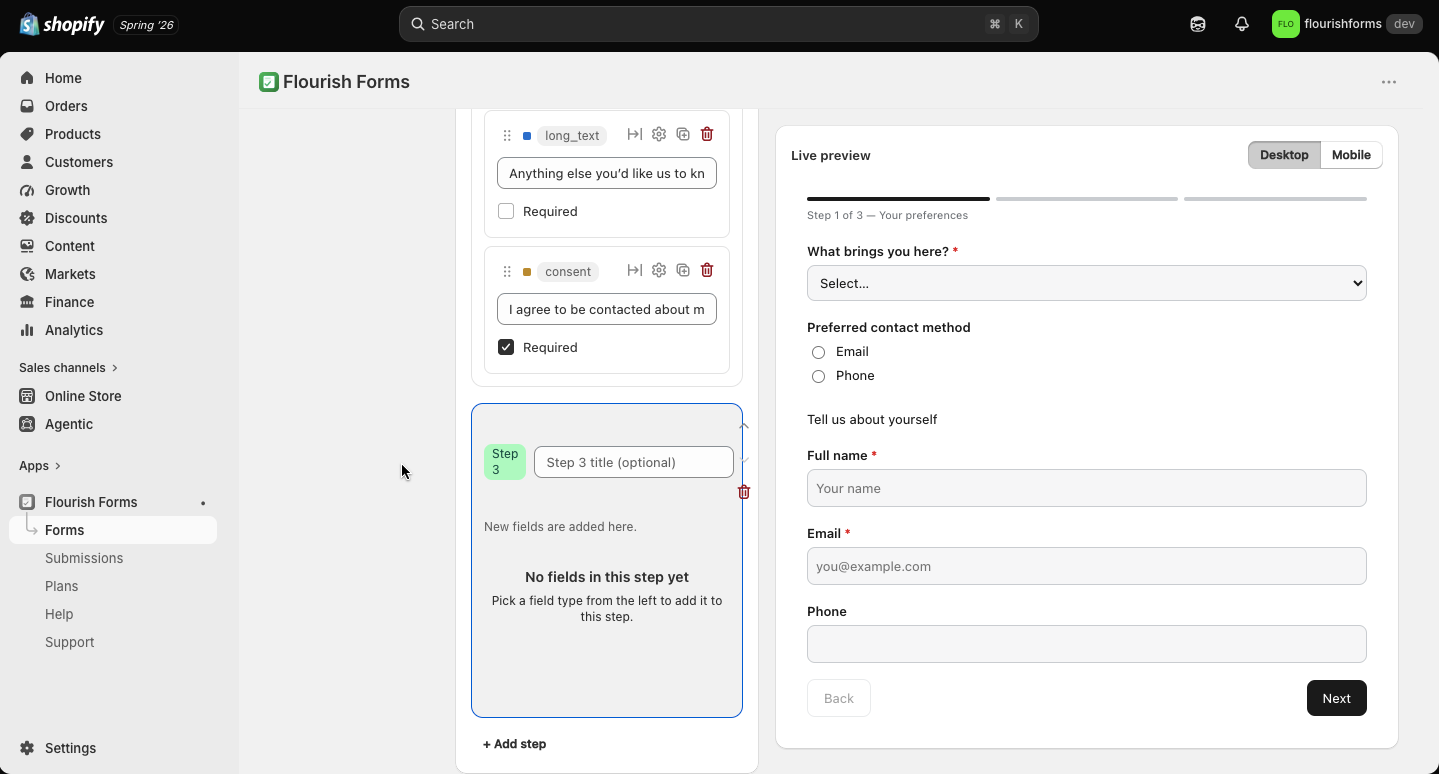
Split a long form into steps so shoppers see a clean progress bar instead of a wall of fields. Each step can be titled; drag fields between steps and reorder them.
The quickest way to see it: start from the Multi-step form template, or click + Add step at the bottom of the fields list. The step headers and a Back/Next progress bar appear as soon as you have two or more steps.
Conditional logic
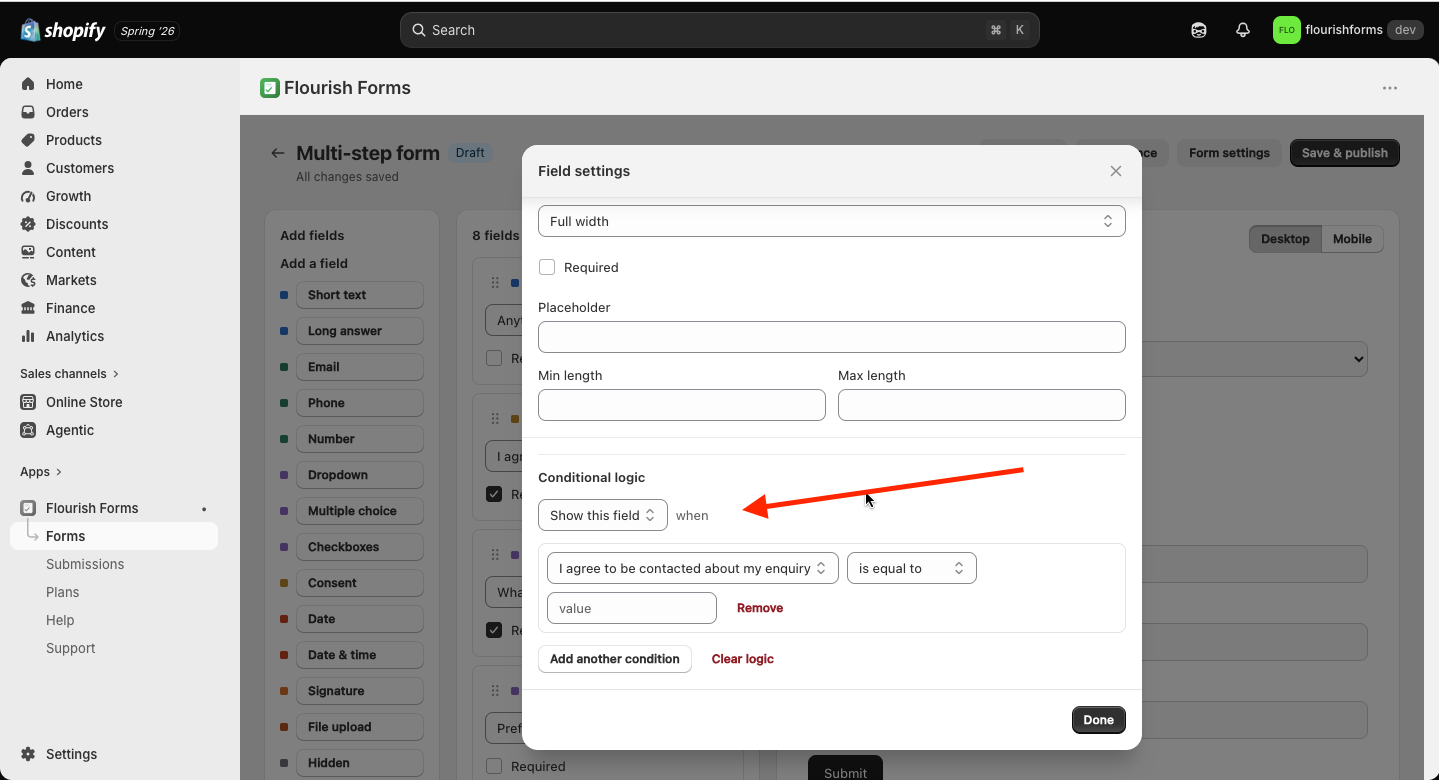
Show or hide fields based on earlier answers, e.g. reveal a “Which product?” dropdown only when someone selects “I have an issue.” Add rules from the field's settings.
Appearance
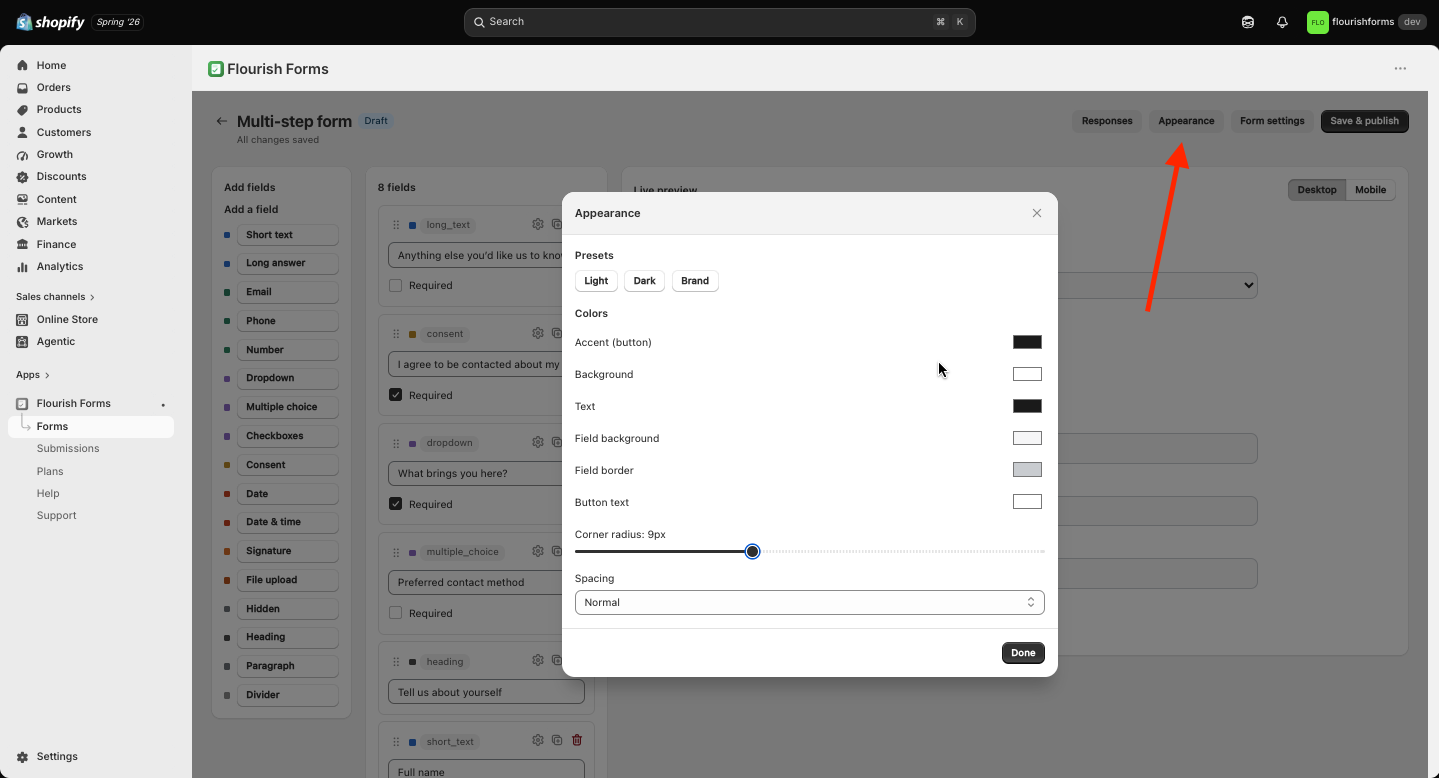
Match your theme: set colours, fonts, spacing, and border radius. A live preview shows the form as shoppers will see it. Forms carry no Flourish branding on your storefront.
Form settings
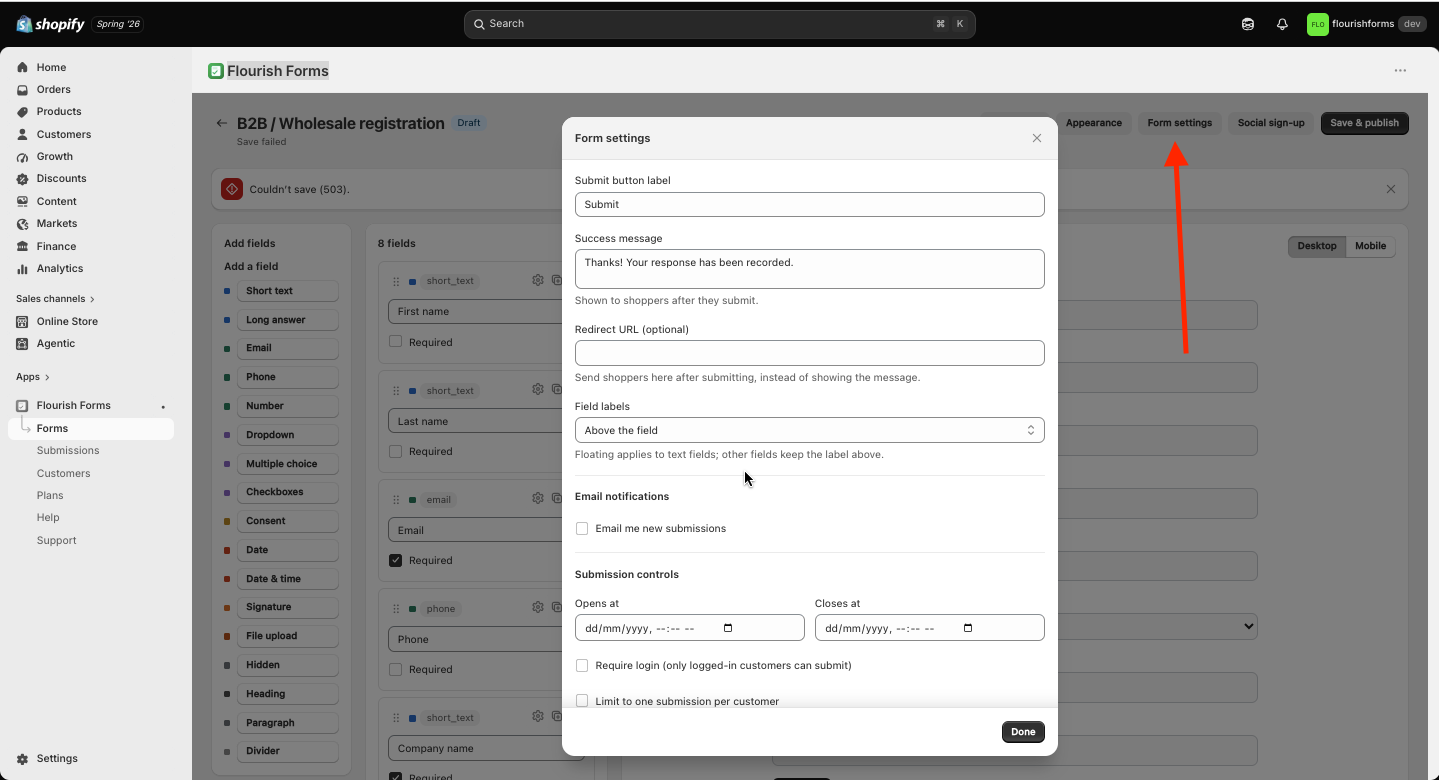
Control behaviour: submit button text, success message, optional redirect URL, a submission window (open/close dates), one submission per customer, and blocked email domains.
Publish & get your Form ID
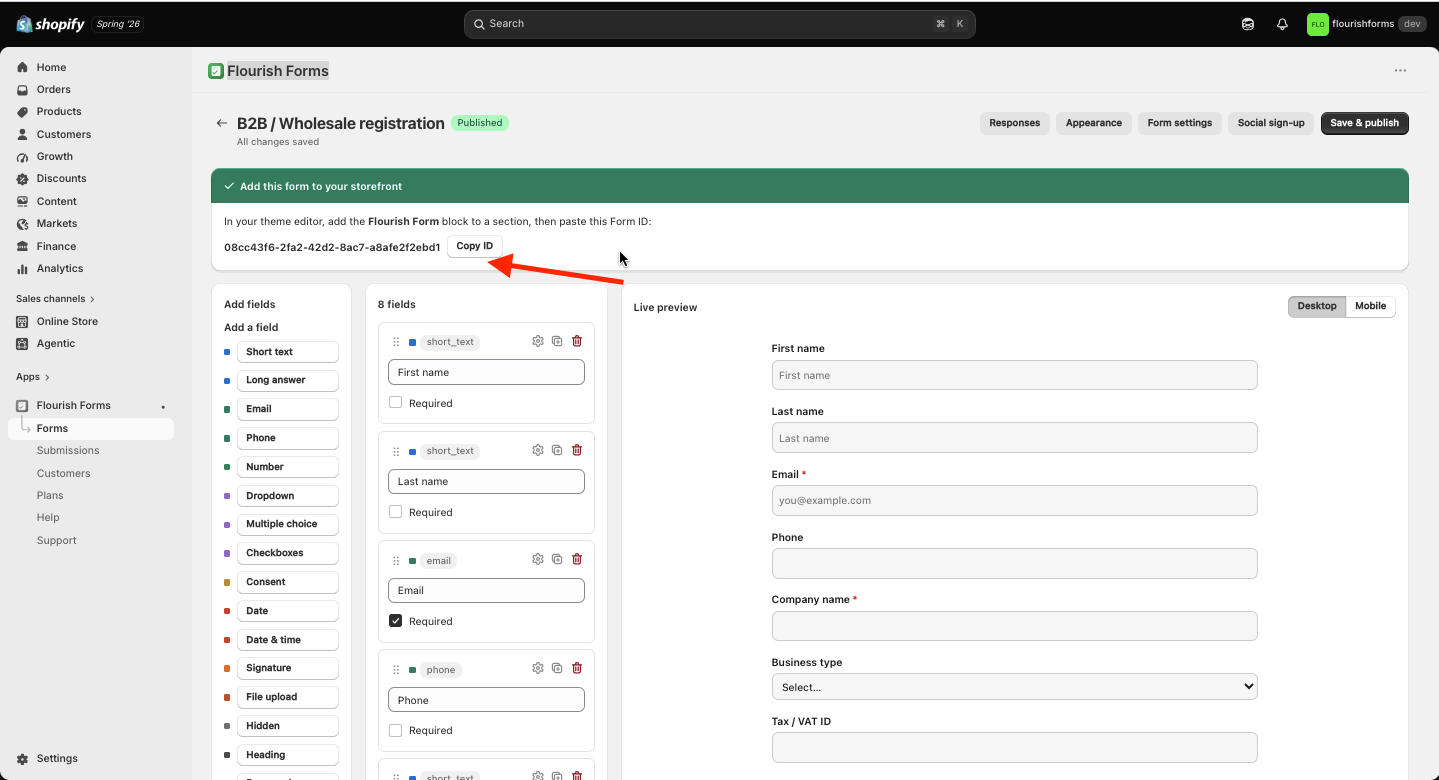
Click Save & publish. The builder shows a Form ID. Copy it. You'll paste this into the storefront app block in the next step.
Add the form to your store
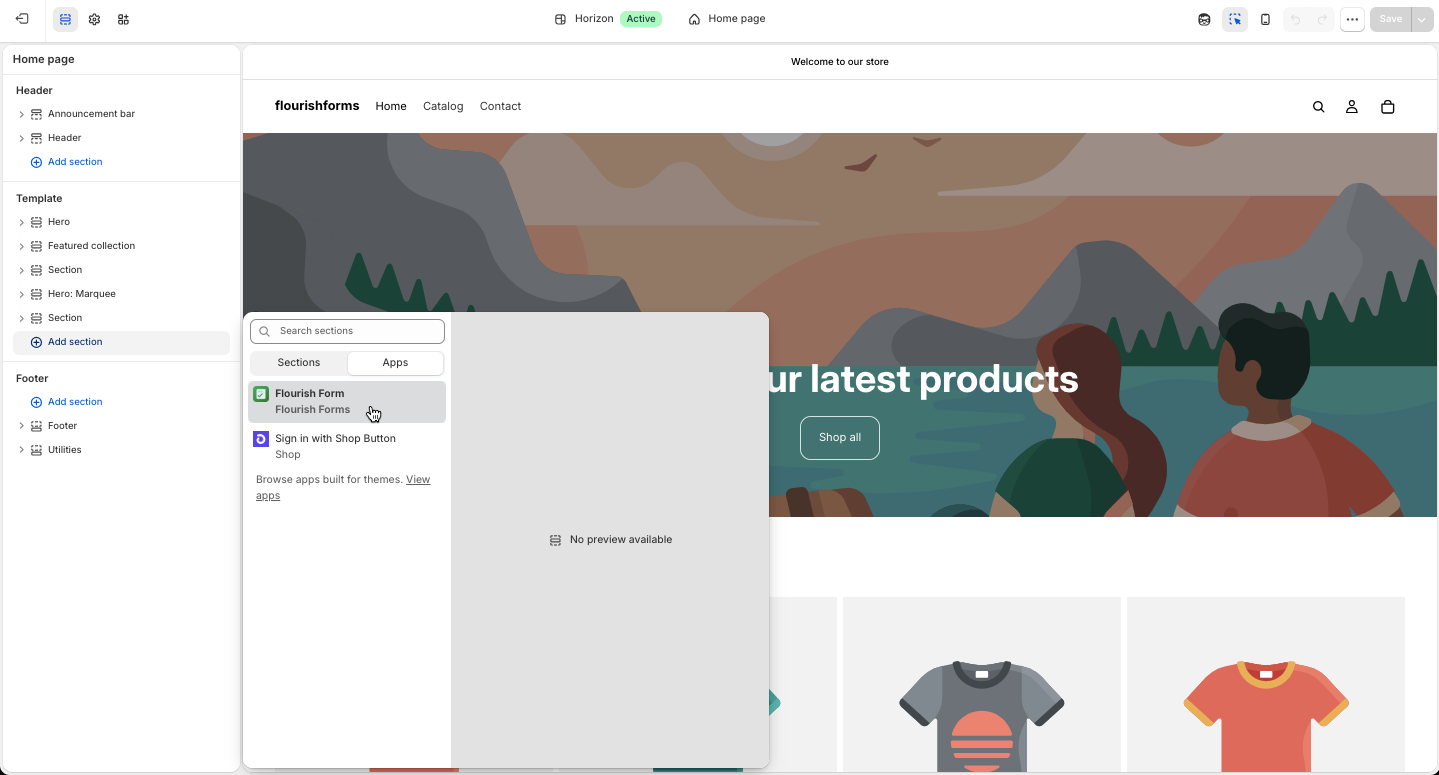
In your Shopify admin, open Online Store → Themes → Customize. On the page or section where you want the form, click Add block (or Add section) and choose Flourish Form under App blocks. Paste your Form ID into the block, then Save.
The form renders instantly. It lives in its own block and never affects your theme or checkout.
Submissions & analytics
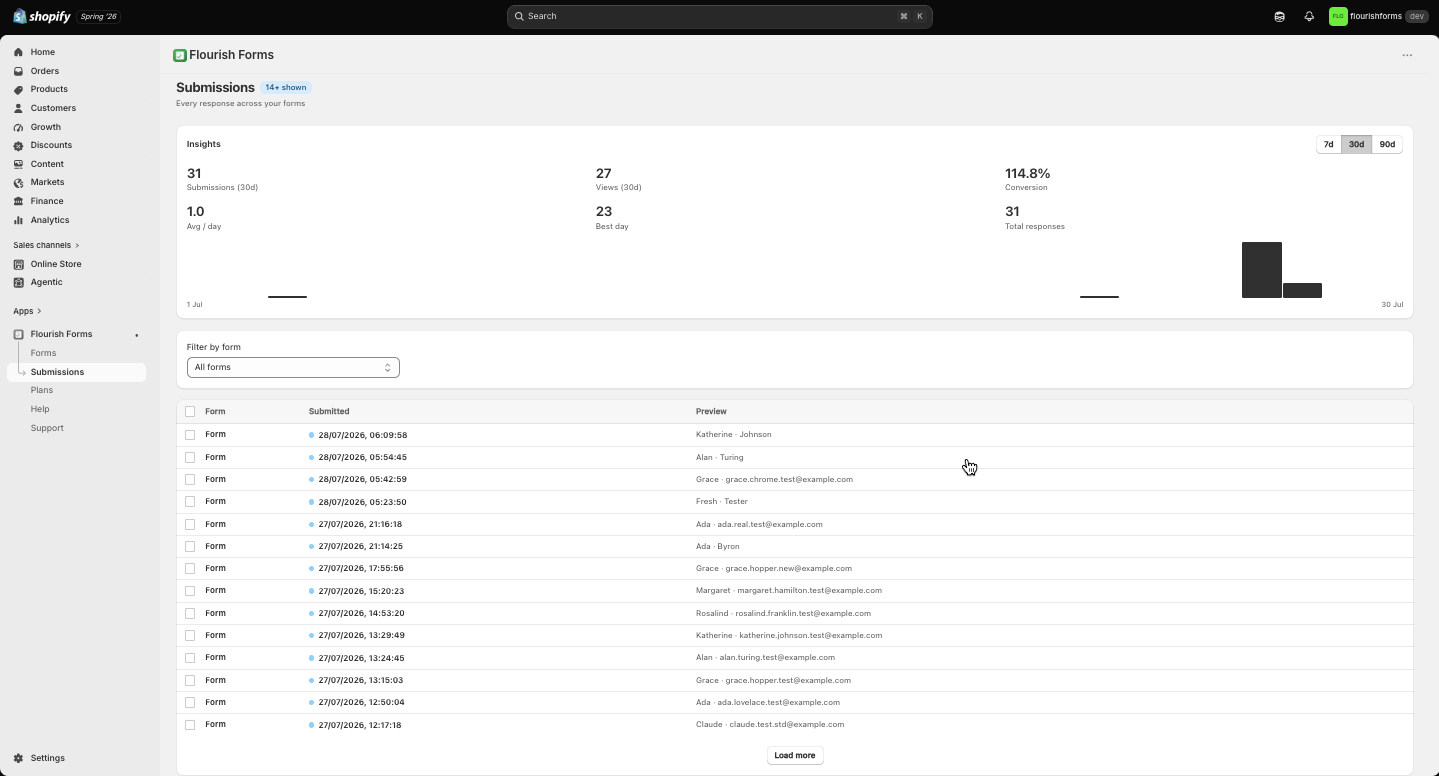
The Submissions page gathers every response across your forms. Open one to see all answers and uploaded files; mark entries read/unread; delete individually or in bulk.
The Insights panel shows submissions, views, and views → submissions conversion over 7/30/90 days, plus your best day and totals. Filter by form, and on paid plans export to CSV for your CRM or spreadsheet.
Email notifications
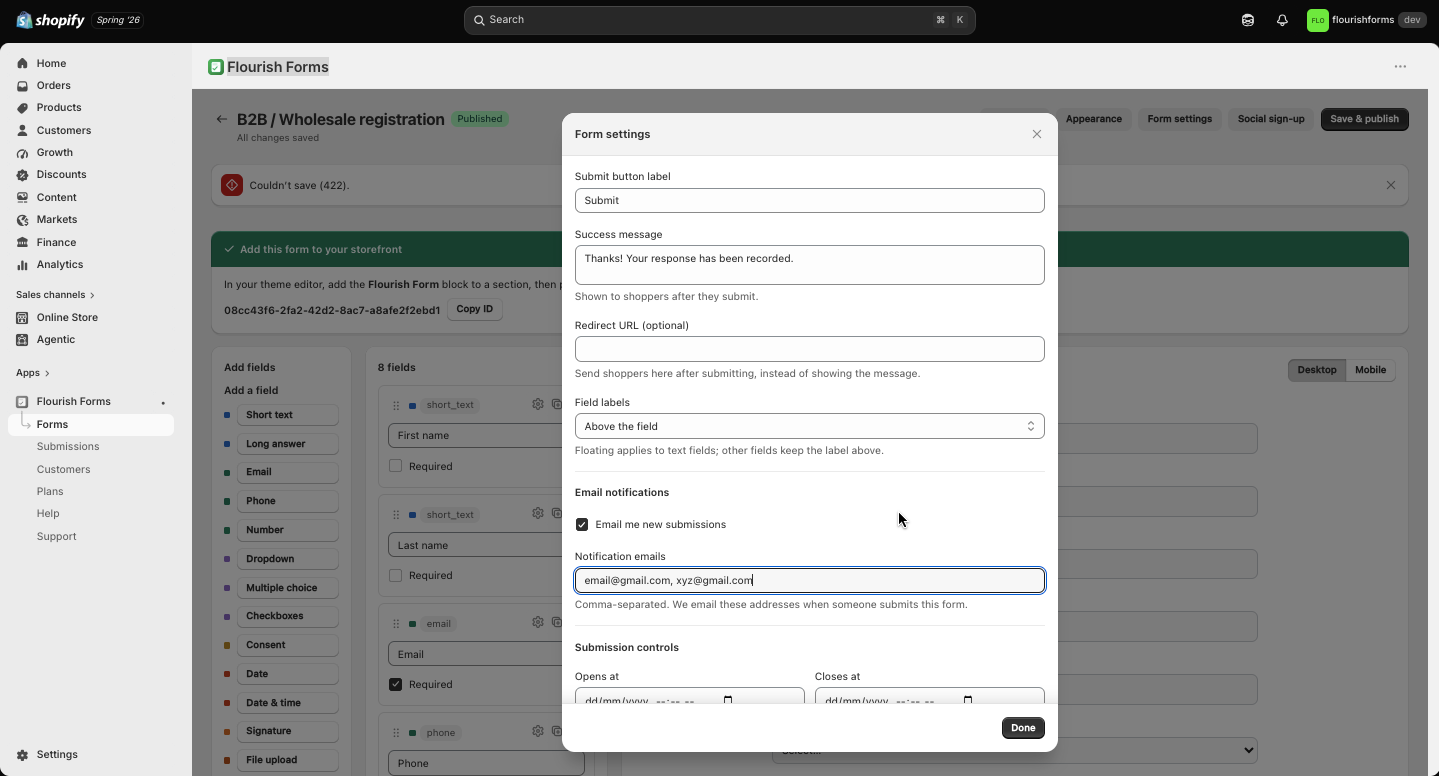
Turn on email notifications in Form settings to get an email on each new submission. Set the recipient address and customise the email content. If emails don't arrive, check the address and your spam folder.
Plans & billing
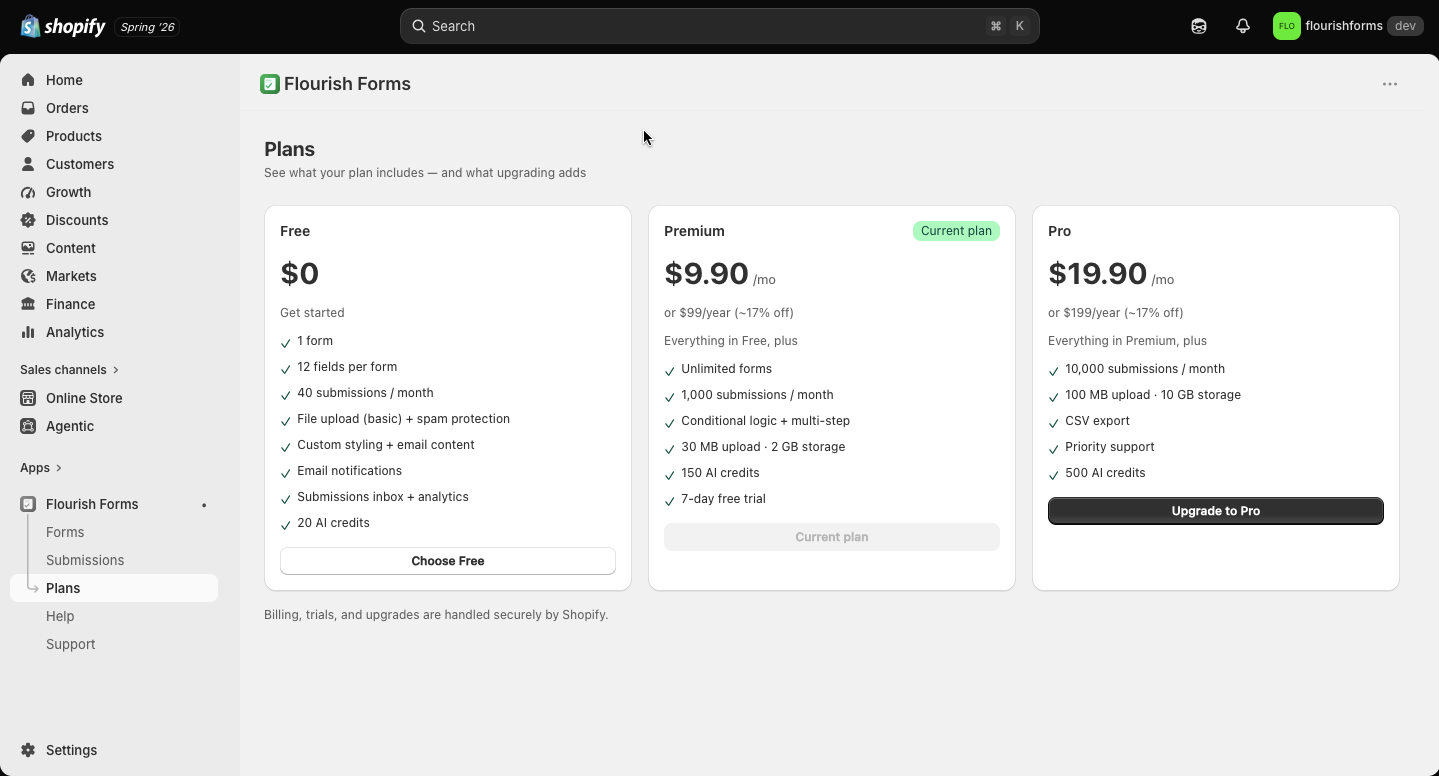
Billing runs through Shopify and appears on your Shopify invoice. The Plans section shows your limits: forms, monthly submissions, AI credits, upload size, and CSV export. Upgrade or downgrade any time; changes apply from the next cycle.
Privacy & data
Flourish Forms only manages your forms and their submissions. It does not access your customers, orders, or checkout. Submissions are stored securely and deleted when you uninstall (or on a data-erasure request). See the Privacy Policy.
Troubleshooting
My form isn't showing on the storefront
It says “This form is currently unavailable”
I'm not receiving notification emails
The submit button does nothing
“Generate with AI” failed or I ran out of credits
Support
Email info@flourishsoftware.in with your store URL and a short description. We'll get back to you.